Google Search Console Explained: What It Is & How to Set It Up

If you’ve spent any time learning about SEO, chances are you’ve heard someone say, “Check Google Search Console.” But if you’re anything like most creative business owners, your first thought was probably… What even is that?
Google Search Console sounds technical, but it’s actually one of the most valuable (and completely free) tools you can set up for your website. It helps you understand how Google sees your website, identify SEO issues, and discover how people are finding your business through search. Better yet, it gives you the insights you need to make smarter SEO decisions that can help grow your business over time.
In this guide, I’ll explain what Google Search Console is, why it matters, and walk you through exactly how to set it up on your Showit website.
What Is Google Search Console?
Think of Google Search Console as your website’s direct line of communication with Google.
While your website visitors never see it, Google Search Console helps you understand how your website is performing in Google Search. It can tell you which pages Google has indexed, what search terms people are using to find you, whether Google is having trouble crawling your website, and much more.
Best of all, it’s completely free.
What Can Google Search Console Tell You?
It helps you:
- See which keywords people use to find your website
- Monitor how many clicks and impressions your pages receive
- Check which pages are indexed by Google
- Submit your sitemap
- Identify indexing issues
- Monitor Core Web Vitals and page performance
- Discover technical SEO issues before they become bigger problems
Do You Really Need Google Search Console?
If you own a website and want people to find it through Google, then yes.
Whether you’re a photographer, designer, florist, wedding professional, coach, or any other service-based business owner, Google Search Console gives you valuable insight into how your website is performing behind the scenes.
It won’t magically improve your SEO overnight—but it gives you the information you need to make smarter decisions.
Google Search Console vs. Google Analytics
| Google Search Console | Google Analytics |
|---|
| Shows how people find your website | Shows what visitors do once they arrive |
| Focuses on Google Search | Focuses on visitor behaviour |
| Helps monitor SEO | Helps measure website traffic |
| Shows search queries | Shows user engagement |
The two tools work together beautifully. Google Search Console helps you understand how people discover your website, while Google Analytics helps you understand what happens after they arrive.
How to Set Up Google Search Console on Your Showit Website
Now that you know what Google Search Console is and why it’s such an important tool, let’s get everything connected. The setup process only takes about 10–15 minutes, and once it’s complete, Google will begin collecting valuable insights about your website.
Step 1: Sign in to Google Search Console
Head to Google Search Console and sign in with the Google account you’d like to use to manage your website.
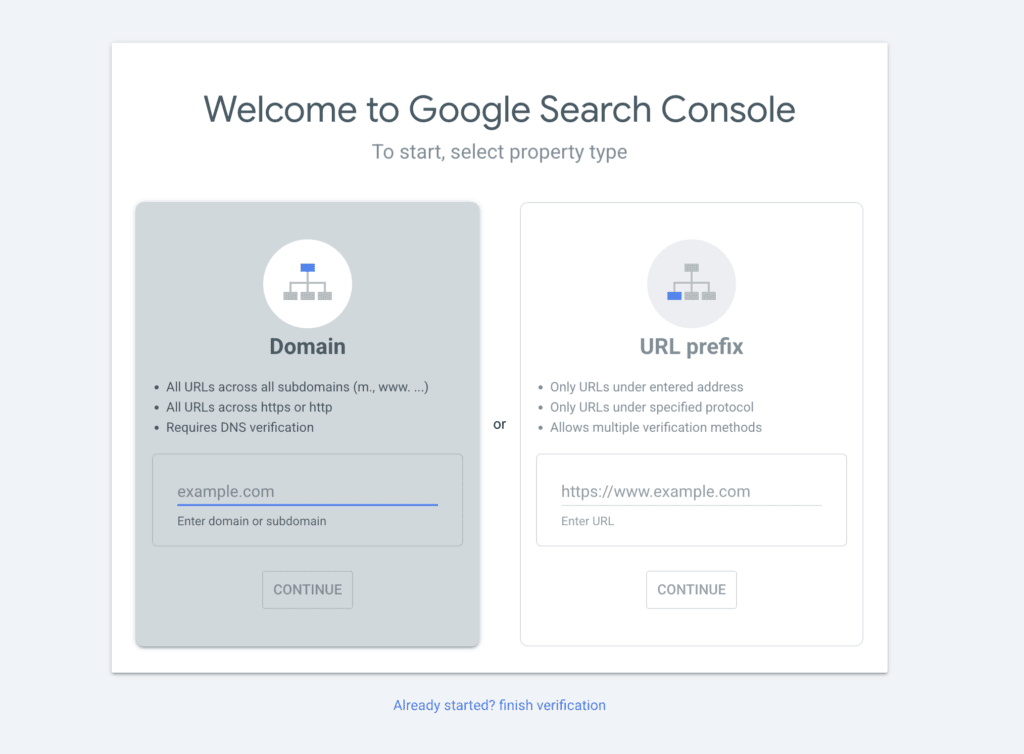
Step 2: Add Your Website as a Property
Once you’ve signed in, Google Search Console will ask you to add your website as a new property. You’ll have two options:
Domain (Recommended)
- Tracks your entire domain, including all subdomains and both http/https versions.
- Requires a DNS verification through your domain registrar.
URL Prefix
- Tracks only the exact URL you enter.
- Offers several verification methods, including an HTML tag.
For most Showit website owners, I recommend choosing the Domain property. Although it takes one extra step to verify through your DNS settings, it gives you a much more complete picture of your website’s performance and you won’t have to verify multiple versions of your site later.
Step 3: Verify your domain ownership
Before Google can begin collecting data about your website, it first needs to confirm that you actually own the domain.
The exact verification process you’ll see depends on where your domain is registered. Some providers (such as GoDaddy) allow Google to verify your domain automatically with just a few clicks, while others require you to manually add a DNS TXT record.
If your provider offers automatic verification, simply click Start Verification and follow the prompts. You’ll be asked to sign in to your domain provider and authorize the connection. Once complete, Google will verify your website automatically.
If your provider doesn’t support automatic verification, Google will instead provide a TXT record for you to copy and add to your domain’s DNS settings. After you’ve added the record, return to Google Search Console and click Verify.
Don’t worry if verification doesn’t happen immediately. DNS changes can sometimes take anywhere from a few minutes to several hours to propagate before Google recognizes them.
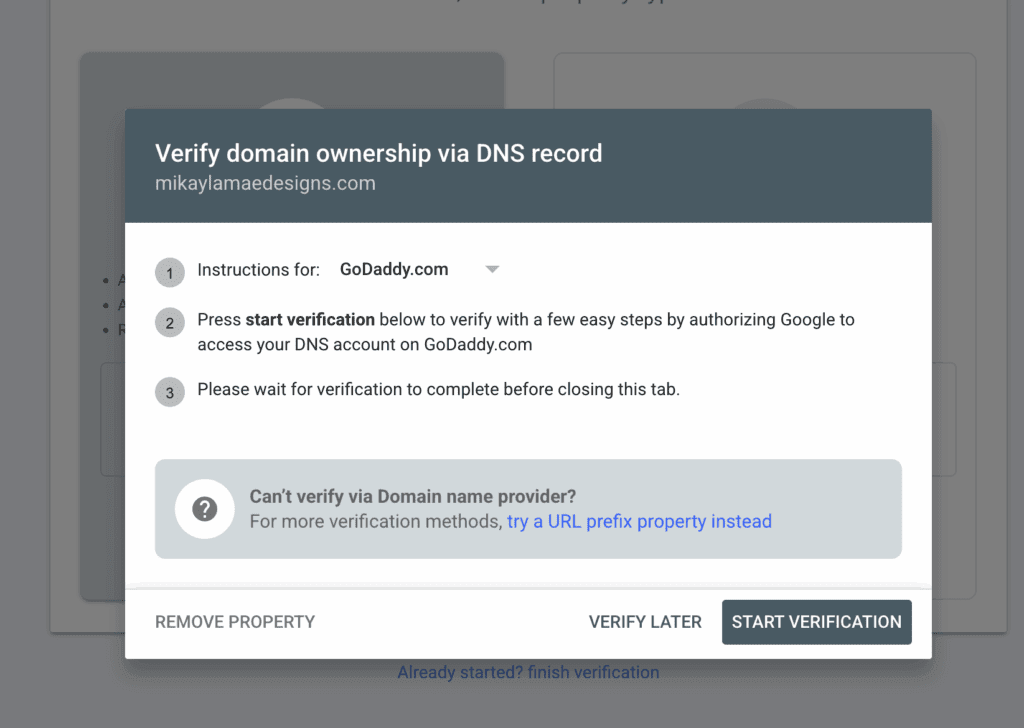
Automatic verification through a supported domain provider.
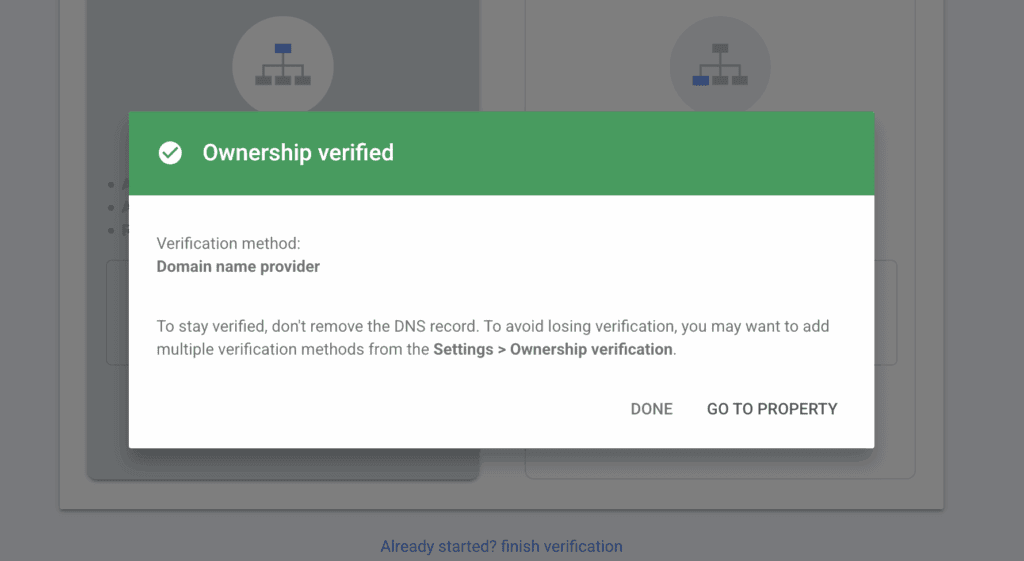
Successful verification confirmation.
Pro Tip: If you aren’t sure where your domain is registered, log in to your Showit account and navigate to Settings → Domains. Showit will tell you which provider your domain is connected through, making it much easier to find the correct DNS settings if manual verification is required.
Step 4: What to do if Automatic Verification Isn’t Available (Skip this step if your domain is already verified)
Not every domain provider supports Google’s one-click verification process. If you don’t see the option to automatically verify your domain. In this case, you can still verify ownership manually.
Google will provide you with a TXT verification record that you’ll need to add to your domain’s DNS settings.
To do this:
- Copy the TXT record Google provides.
- Log in to the company where you purchased your domain (such as Squarespace Domains, Namecheap, Cloudflare, or another registrar).
- Open your domain’s DNS settings.
- Add a new TXT Record and paste the code into the Value field.
- Save your changes, then return to Google Search Console and click Verify.
Keep in mind that DNS changes can take anywhere from a few minutes to several hours to update, so don’t panic if verification doesn’t happen immediately.
If you’re unsure where your domain is registered, you can find this inside your Showit account under Settings → Domains.
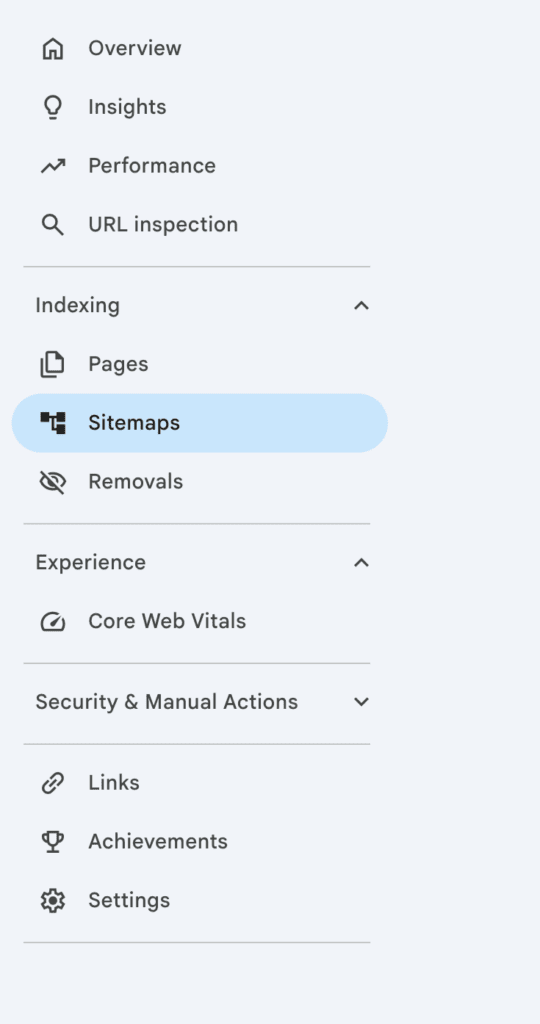
Step 6: Submit Your Website Sitemap
Once your website has been verified, it’s time to help Google discover your pages. You can then click “Go to Property” and it will take you inside Google Search Console. Here you can select Sitemaps from the left-hand menu. In the “Add a new sitemap” field, enter your sitemap URL and click Submit.
If you’re using Showit, your website sitemap is automatically generated every time you publish your website, so you don’t need to create one yourself. However, I still recommend submitting it to Google Search Console to help Google discover and crawl your pages more efficiently.
If you have a Showit website without a blog
You only need to submit one sitemap:
yourdomain.com/siteinfo.xml
If you have a Showit website with a WordPress blog
You’ll want to submit both of these sitemaps:
Showit Website Pages
yourdomain.com/siteinfo.xml
WordPress Blog
yourdomain.com/sitemap_index.xml(or the sitemap generated by your SEO plugin, such as Yoast SEO.)
Submitting both sitemaps helps Google discover and index both your website pages and your blog posts, giving your entire website the best chance of appearing in search results.

Pro Tip: Don’t worry if Google doesn’t process your sitemap immediately. It can take a little time before the status changes to “Success“, especially for newer websites.
Step 7: Give Google Time to Collect Data
Your setup is officially complete!
At first, your dashboard may look a little empty, and that’s completely normal. Google needs time to crawl your website, process your pages, and begin collecting search data.
Within the next few days, you’ll gradually start seeing information like:
- Which search terms people use to find your website
- Which pages are receiving impressions and clicks
- How often your pages appear in Google Search
- Any indexing issues Google identifies
- Opportunities to improve your website’s SEO
Remember, Google Search Console isn’t meant to provide instant results. Instead, think of it as a long-term tool that helps you understand how your website is growing over time.
What Should You Do Next?
Now that Google Search Console is connected, here are a few next steps I’d recommend:
✓ Submit new blog posts through your sitemap.
✓ Check your Performance report every few weeks to see which pages are gaining visibility.
✓ Monitor any indexing issues that Google flags.
✓ Connect Google Analytics to better understand what visitors do once they arrive on your website.
✓ Continue publishing helpful, SEO-focused content that answers your audience’s questions.
Common Mistakes to Avoid
1. Choosing URL Prefix Instead of Domain
When setting up Google Search Console, I recommend choosing the Domain property whenever possible. It tracks your entire website—including both the www and non-www versions, as well as both HTTP and HTTPS—giving you a more complete view of your website’s performance. The URL Prefix option is still useful in certain situations, but for most Showit websites, the Domain property is the better long-term choice.
2. Forgetting to Submit Your Sitemap
Verifying your website is only part of the setup process. Submitting your sitemap helps Google discover your pages more efficiently, especially as you continue publishing new blog posts. While Google may eventually find your pages on its own, submitting your sitemap can help speed up the process.
3. Expecting Data Immediately
One of the biggest misconceptions is expecting Google Search Console to start showing data right away. In reality, it often takes anywhere from a few hours to several days before information begins appearing in your dashboard. If everything has been verified correctly, a little patience is usually all that’s needed.
4. Verifying the Wrong Version of Your Website
If you’re using the URL Prefix option instead of the Domain property, it’s important to verify the exact version of your website that visitors use (for example, https://yourdomain.com versus https://www.yourdomain.com). Choosing the Domain property helps avoid this issue altogether by tracking every version of your domain under a single property.
5. Not checking Google Search Console after setup
Setting up Google Search Console is only the first step. Make a habit of checking in every few weeks to review your Performance report, monitor indexing issues, and see which search queries are bringing people to your website. Even a quick five-minute check can give you valuable insight into how your SEO is progressing.
Need a Hand Getting It All Set Up?
If you run into any roadblocks while setting up Google Search Console, or you’d simply rather have someone else take care of the technical side—I’d be happy to help.
Connecting Google Search Console, submitting sitemaps, and ensuring everything is configured correctly is something I do for every website client as part of my website design process. It’s one of the many behind-the-scenes SEO foundations I put in place before a website ever launches.
If you already have a website but aren’t sure whether everything has been set up correctly, my Website Audit will uncover any missed SEO opportunities and provide you with a clear action plan.
Looking for hands-on support? Book Office Hours and we’ll set up Google Search Console together, troubleshoot any issues, and answer your questions live.
Or, if your website has become one long to-do list of updates, optimizations, and technical tasks, The Studio Intensive is the perfect opportunity to tackle everything in a focused day with an expert by your side.
Wherever you are in your website journey, you don’t have to figure it all out alone.
Final Thoughts
Google Search Console may seem intimidating at first, but it’s one of the simplest and most valuable tools you can add to your website. Once it’s connected, you’ll gain a much clearer picture of how your website is performing in search and where there are opportunities to improve.
Think of it less as another thing to manage and more as a helpful guide that shows you how Google sees your website.